Running Laravel in Docker on your laptop takes a few minutes. Running it in production is a different job. Now you need HTTPS, queue workers that restart with new code, a scheduler that runs exactly once, a database nobody on the internet can reach, secrets that never end up inside an image, backups you have actually tested, and a release process that does not take the site down every time you deploy.
Most guides stop at docker compose up. Some even deploy with Laravel Sail, which is built for local development, not for production. This guide walks through a complete, secure production setup on a single VPS, from hardening the server to safe releases and backups, with the configuration files you need at each step.
The setup works for most Laravel apps, from a small SaaS to a busy client project, and it scales out later without starting again. If you are still weighing up hosting options, this comparison of shared vs VPS hosting covers when a VPS is the right choice in the first place.
Quick answer: how to deploy Laravel with Docker on a VPS
- Harden the VPS: SSH keys, a firewall and automatic security updates.
- Install Docker Engine and the Docker Compose plugin.
- Build a multi-stage production image with no dev dependencies.
- Run separate containers for Nginx, PHP-FPM, queue workers and the scheduler.
- Keep the database and Redis on a private Docker network, never on public ports.
- Put a reverse proxy with automatic SSL in front.
- Release with: pull new images, migrate, recreate containers, check
/up.
Before You Start: What This Setup Includes
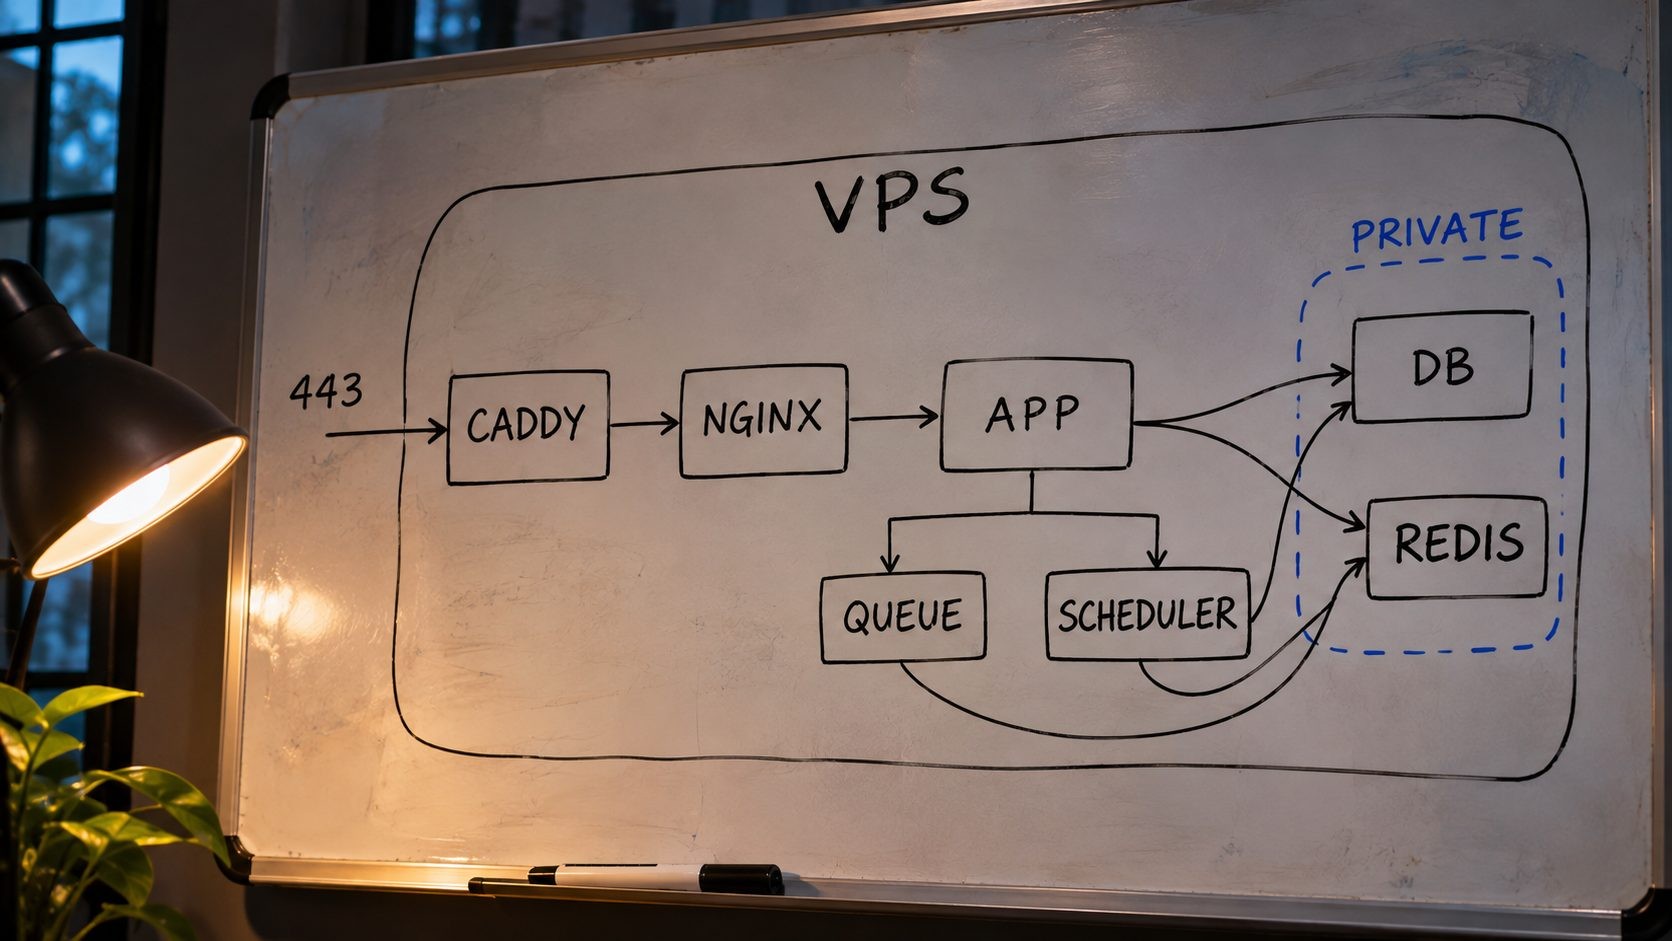
Here is therchitecture this guide builds, all on one VPS:
- Caddy as the reverse proxy, handling HTTPS certificates automatically and the only container with public ports (80 and 443).
- Nginx serving static files and passing PHP requests on.
- App container running PHP-FPM with your Laravel code.
- Queue container running
queue:work, from the same image as the app. - Scheduler container running
schedule:work, also from the same image. - PostgreSQL (or MySQL) for data, on a private network with a persistent volume.
- Redis for cache, sessions and queues, also private.
In your repository, the Docker files sit alongside the app:
text
myapp/
  Dockerfile
  .dockerignore
  docker/entrypoint.sh
  docker/nginx/default.conf
  docker/php/production.ini
  (the rest of your Laravel app)
On the server, you only need /srv/myapp with compose.yaml, Caddyfile, .env and deploy.sh. The code itself arrives inside the images.
Each process gets its own container. That makes logs clearer, lets each one restart on its own, and means a stuck queue worker never takes the website down with it.
Why not Laravel Sail? Sail is an excellent local development environment, but it is built for convenience on a developer machine: development dependencies, debugging tools and settings that are not meant to face the internet. Production needs a lean image, production PHP settings, a non-root user and separate processes, which is what the steps below build.
When Docker is not worth it. A simple brochure site or a small app with no queues may be easier to run with a traditional server setup or a managed platform. Docker pays off when you want identical environments, repeatable releases and easy rollbacks.
Step 1: Choose and Harden the VPS
Sizing the server
For a small to medium Laravel app with a database, Redis and a queue worker on the same machine, 2 GB of RAM is a workable minimum and 4 GB is comfortable. Add more if you run several workers, large imports or a busy database. Fast NVMe storage helps database performance noticeably.
You need full root access and a modern Linux distribution such as Ubuntu or Debian. Nexi Bloom's VPS plans, for example, come with root access, NVMe storage and a choice of Ubuntu, Debian or AlmaLinux, which is all this setup needs.
Basic hardening
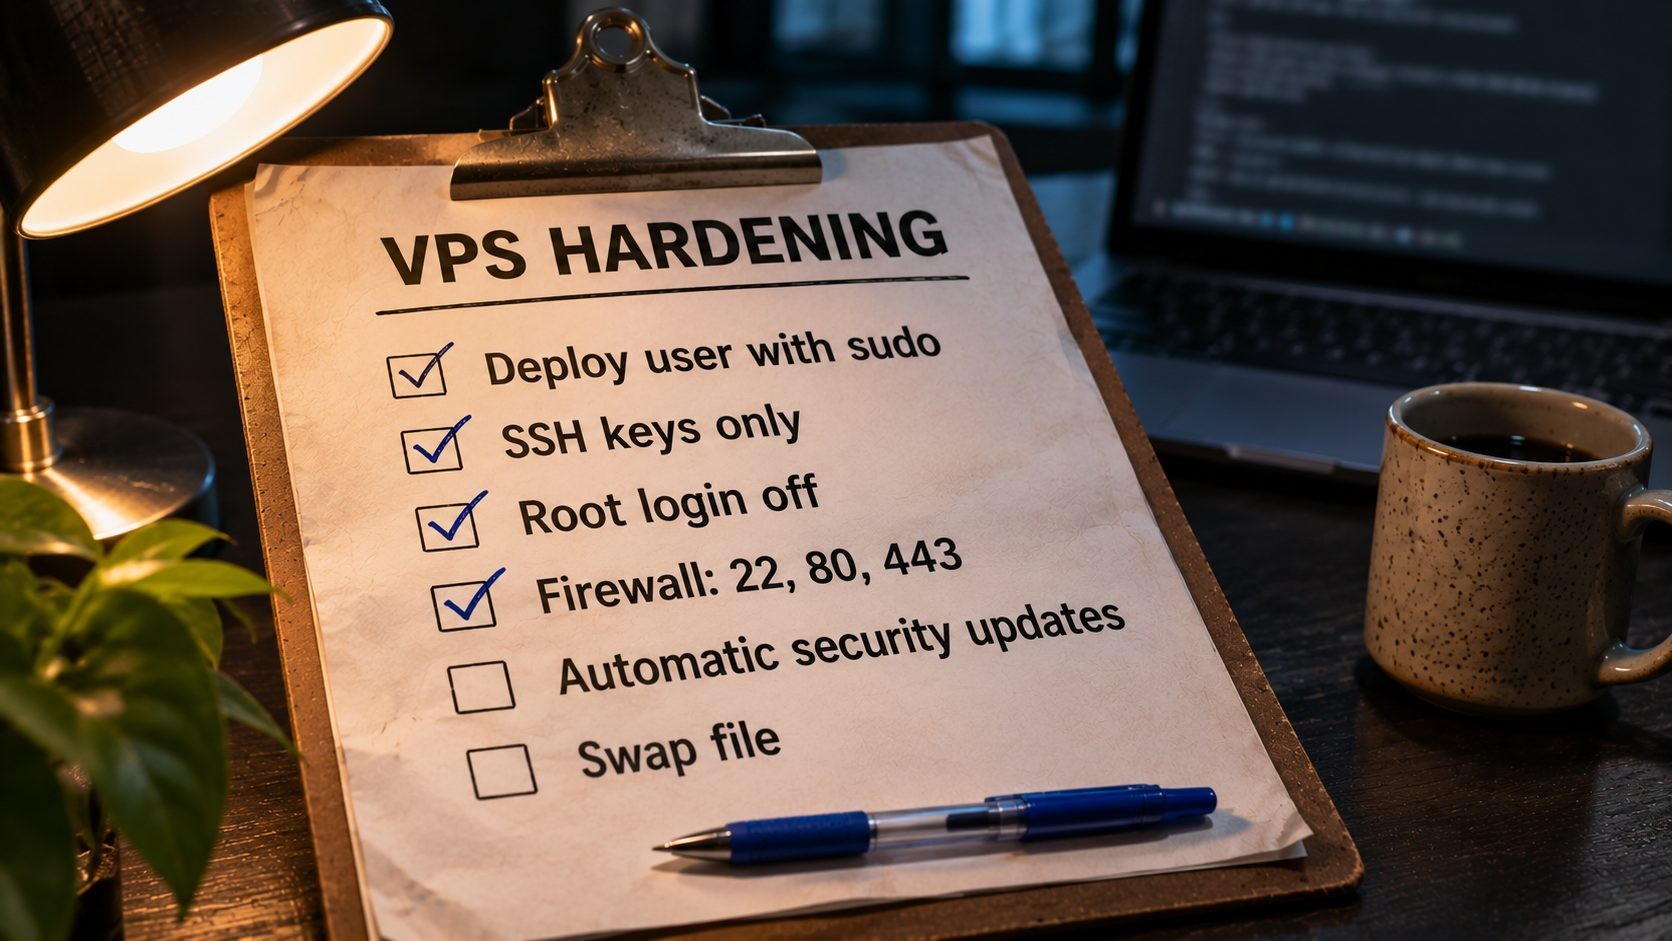
Before installing anything, lock the server down:
bash
# Create a deploy user and give it sudo
adduser deploy
usermod -aG sudo deploy

# Copy your SSH key to the new user (run from your own machine)
ssh-copy-id deploy@your-server-ip

# Then, on the server, disable password and root logins in /etc/ssh/sshd_config:
#   PasswordAuthentication no
#   PermitRootLogin no
sudo systemctl restart ssh

# Firewall: allow SSH, HTTP and HTTPS only
sudo ufw default deny incoming
sudo ufw allow OpenSSH
sudo ufw allow 80,443/tcp
sudo ufw enable

# Automatic security updates
sudo apt update && sudo apt install -y unattended-upgrades
sudo dpkg-reconfigure --priority=low unattended-upgrades
On a server with 2 GB of RAM, add a swap file as well, so a memory spike during a large job or a database maintenance task does not crash containers.
Two more small steps pay off later. Set the server's time zone and keep it on UTC, so logs, scheduled tasks and database timestamps all agree. And install fail2ban or rely on SSH key-only login to stop the constant password-guessing attempts every public server receives. Test that you can still log in as the deploy user in a second terminal before closing your current session, so a typo in the SSH config never locks you out.
Install Docker Engine and Compose
Install Docker from Docker's official repository rather than an old distribution package, following Docker's installation guide for your distribution. On Ubuntu and Debian, after adding the repository, the install is:
bash
sudo apt install -y docker-ce docker-ce-cli containerd.io docker-buildx-plugin docker-compose-plugin
sudo usermod -aG docker deploy
Log out and back in, then check that docker compose version works. This guide uses the Compose plugin (docker compose), not the old standalone docker-compose command.
Step 2: Prepare Laravel for Production
A few application settings matter before you build anything. Laravel's deployment documentation covers them in detail.
- Turn debug off. Set
APP_ENV=productionandAPP_DEBUG=false. Laravel's documentation is direct: in production, debug "should always be false", because debug pages can expose configuration values. - Only call
env()inside config files. Once you cache configuration, Laravel stops loading the.envfile, and calls toenv()anywhere else return null. This is one of the most common production bugs. - Trust the proxy. Your app will sit behind Caddy and Nginx, so tell Laravel to trust forwarded headers. Otherwise it generates
http://links and redirects on an HTTPS site. Inbootstrap/app.php:
php
->withMiddleware(function (Middleware $middleware) {
    // Only the internal Docker network can reach the app, so trusting all proxies is safe here.
    $middleware->trustProxies(at: '*');
})- Log to standard error. Set
LOG_CHANNEL=stderrso container logs show Laravel's logs, and you do not fill a volume with log files. - Use Redis for cache, sessions and queues. Set
CACHE_STORE=redis,SESSION_DRIVER=redisandQUEUE_CONNECTION=redis. File-based sessions and cache tie users to one container's filesystem, which breaks the moment you run more than one app container. The database driver works too, but Redis takes that load off your database. - Store uploads somewhere durable. Local storage on a Docker volume works on one server. If you expect to add servers later, use an S3-compatible bucket from day one, so you never have to migrate user files.
- Use the health route. Laravel serves a health check at
/up, which returns 200 when the app boots and 500 when it does not. You will use it to confirm every release.
Step 3: Build a Production Docker Image
A multi-stage Dockerfile
A multi-stage build keeps build tools out of the final image. This Dockerfile builds the PHP extensions once, compiles front-end assets in a Node stage, installs Composer dependencies without dev packages, and produces two final images: one for PHP-FPM and one for Nginx.
dockerfile
# syntax=docker/dockerfile:1

# ---------- Base: PHP with the extensions Laravel needs ----------
FROM php:8.4-fpm-alpine AS base
RUN apk add --no-cache icu-dev libzip-dev postgresql-dev $PHPIZE_DEPS \
 && docker-php-ext-install pdo_pgsql intl zip opcache bcmath pcntl \
 && pecl install redis && docker-php-ext-enable redis \
 && apk del $PHPIZE_DEPS
COPY --from=composer:2 /usr/bin/composer /usr/bin/composer
WORKDIR /var/www/html

# ---------- Front-end assets ----------
FROM node:22-alpine AS assets
WORKDIR /app
COPY package.json package-lock.json ./
RUN npm ci
COPY . .
RUN npm run build

# ---------- App image (PHP-FPM) ----------
FROM base AS app
RUN cp "$PHP_INI_DIR/php.ini-production" "$PHP_INI_DIR/php.ini"
COPY docker/php/production.ini "$PHP_INI_DIR/conf.d/zz-production.ini"

COPY composer.json composer.lock ./
RUN composer install --no-dev --no-scripts --no-autoloader --prefer-dist --no-interaction

COPY . .
COPY --from=assets /app/public/build ./public/build
RUN composer dump-autoload --optimize --no-dev \
 && ln -sfn ../storage/app/public public/storage \
 && chown -R www-data:www-data storage bootstrap/cache

COPY docker/entrypoint.sh /usr/local/bin/entrypoint.sh
RUN chmod +x /usr/local/bin/entrypoint.sh
USER www-data
ENTRYPOINT ["entrypoint.sh"]
CMD ["php-fpm"]

# ---------- Web image (Nginx) ----------
FROM nginx:alpine AS web
COPY docker/nginx/default.conf /etc/nginx/conf.d/default.conf
COPY --from=app /var/www/html/public /var/www/html/public
Adjust the PHP version and extensions to match your app. If you use MySQL instead of PostgreSQL, swap postgresql-dev and pdo_pgsql for pdo_mysql.
The entrypoint caches configuration, routes, views and events when each container starts, using the real environment variables available at runtime:
sh
#!/bin/sh
# docker/entrypoint.sh
set -e
php artisan optimize
exec "$@"
Caching at startup rather than at build time matters. If you ran config:cache during the build, the image would contain whatever environment was present on the build machine, which is exactly what you do not want.
Keep secrets out of the image
A .dockerignore file stops your local .env, Git history and dependencies from being copied into the build:
text
.env
.env.*
.git
node_modules
vendor
storage/logs/*
storage/framework/cache/*
storage/framework/sessions/*
storage/framework/views/*
tests
Production PHP settings
php.ini-production is a good base. Add a small override file for OPcache and limits:
ini
; docker/php/production.ini
opcache.enable=1
opcache.memory_consumption=192
opcache.max_accelerated_files=20000
opcache.validate_timestamps=0
memory_limit=256M
upload_max_filesize=20M
post_max_size=20M
expose_php=Off
opcache.validate_timestamps=0 tells PHP never to check files for changes, which is safe because code only changes when you deploy a new image, and every deploy starts fresh containers.
Step 4: Write the Production docker-compose.yml
This file runs every service. It lives on the server next to your .env, a Caddyfile and nothing else. The images are built in CI and pulled from a registry, which keeps build tools off the production server.
yaml
# compose.yaml
x-logging: &logging
  driver: json-file
  options:
    max-size: "10m"
    max-file: "3"

x-app: &app
  image: registry.example.com/myapp-app:${TAG:-latest}
  env_file: .env
  volumes:
    - storage:/var/www/html/storage
  depends_on:
    db:
      condition: service_healthy
    redis:
      condition: service_started
  restart: unless-stopped
  logging: *logging

services:
  caddy:
    image: caddy:2-alpine
    ports:
      - "80:80"
      - "443:443"
    volumes:
      - ./Caddyfile:/etc/caddy/Caddyfile:ro
      - caddy_data:/data
      - caddy_config:/config
    depends_on:
      - web
    restart: unless-stopped
    logging: *logging

  web:
    image: registry.example.com/myapp-web:${TAG:-latest}
    volumes:
      - storage:/var/www/html/storage:ro
    depends_on:
      app:
        condition: service_healthy
    restart: unless-stopped
    logging: *logging

  app:
    <<: *app
    healthcheck:
      test: ["CMD-SHELL", "nc -z 127.0.0.1 9000 || exit 1"]
      interval: 10s
      timeout: 3s
      retries: 5

  queue:
    <<: *app
    command: ["php", "artisan", "queue:work", "--tries=3", "--max-time=3600"]
    stop_grace_period: 60s

  scheduler:
    <<: *app
    command: ["php", "artisan", "schedule:work"]

  db:
    image: postgres:18-alpine
    environment:
      POSTGRES_DB: ${DB_DATABASE}
      POSTGRES_USER: ${DB_USERNAME}
      POSTGRES_PASSWORD: ${DB_PASSWORD}
    volumes:
      - db_data:/var/lib/postgresql/data
    healthcheck:
      test: ["CMD-SHELL", "pg_isready -U $${POSTGRES_USER} -d $${POSTGRES_DB}"]
      interval: 10s
      timeout: 5s
      retries: 5
    restart: unless-stopped
    logging: *logging

  redis:
    image: redis:alpine
    command: ["redis-server", "--appendonly", "yes"]
    volumes:
      - redis_data:/data
    restart: unless-stopped
    logging: *logging

volumes:
  storage:
  db_data:
  redis_data:
  caddy_data:
  caddy_config:
Set DB_HOST=db and REDIS_HOST=redis in your .env, because containers reach each other by service name on the Compose network. If you are deciding between PostgreSQL and MySQL for this setup, this comparison of PostgreSQL vs MySQL for a Laravel SaaS covers the trade-offs. On PostgreSQL's official image, check the data directory path for your version in the image documentation before creating the volume, since it has changed between major versions.
Using MySQL instead of PostgreSQL
Swapping databases changes only a few lines. Replace the db service image with an official MySQL or MariaDB image, set its MYSQL_DATABASE, MYSQL_USER, MYSQL_PASSWORD and MYSQL_ROOT_PASSWORD variables, mount its data directory to the db_data volume, and use mysqladmin ping as the health check. In the Dockerfile, install pdo_mysql instead of pdo_pgsql, and in .env, set DB_CONNECTION=mysql. The rest of the setup, including the private network and the release process, stays exactly the same.
One process per container
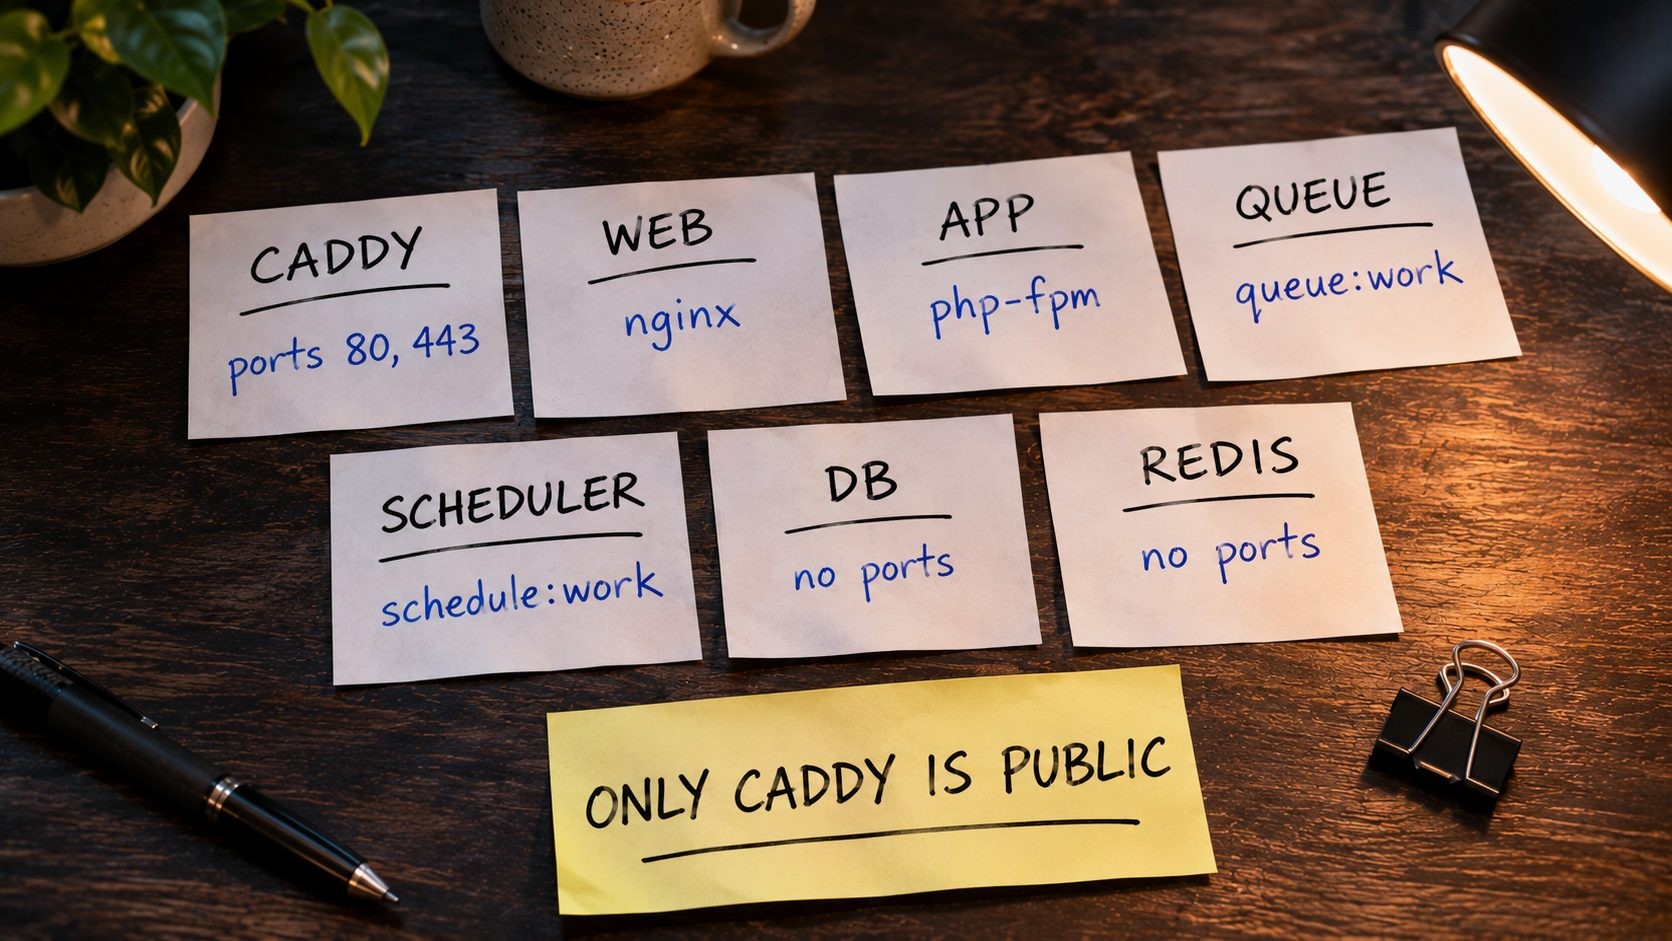
The app, queue and scheduler all use the same image, so they always run the same code. Only the command differs. The queue worker uses --max-time=3600 so it restarts itself hourly, which clears any slow memory growth, and stop_grace_period gives a running job time to finish when the container stops. The scheduler uses schedule:work, which runs scheduled tasks every minute without needing cron inside the container. Run only one scheduler container, or tasks will run twice.
The Nginx configuration
nginx
# docker/nginx/default.conf
server {
    listen 80;
    server_name _;
    root /var/www/html/public;
    index index.php;
    client_max_body_size 20M;

    location / {
        try_files $uri $uri/ /index.php?$query_string;
    }

    location ~ ^/index\.php(/|$) {
        fastcgi_pass app:9000;
        fastcgi_param SCRIPT_FILENAME $realpath_root$fastcgi_script_name;
        include fastcgi_params;
        fastcgi_hide_header X-Powered-By;
    }

    # Block direct access to any other PHP file and to dotfiles
    location ~ \.php$ { return 404; }
    location ~ /\.(?!well-known).* { deny all; }
}
The document root is public/, never the project root. Laravel's documentation warns that serving from the project root exposes sensitive files to the internet. Nginx gets the storage volume read-only, so it can serve uploaded files through the public/storage link without being able to change them.
Security callout: do not publish database or Redis ports
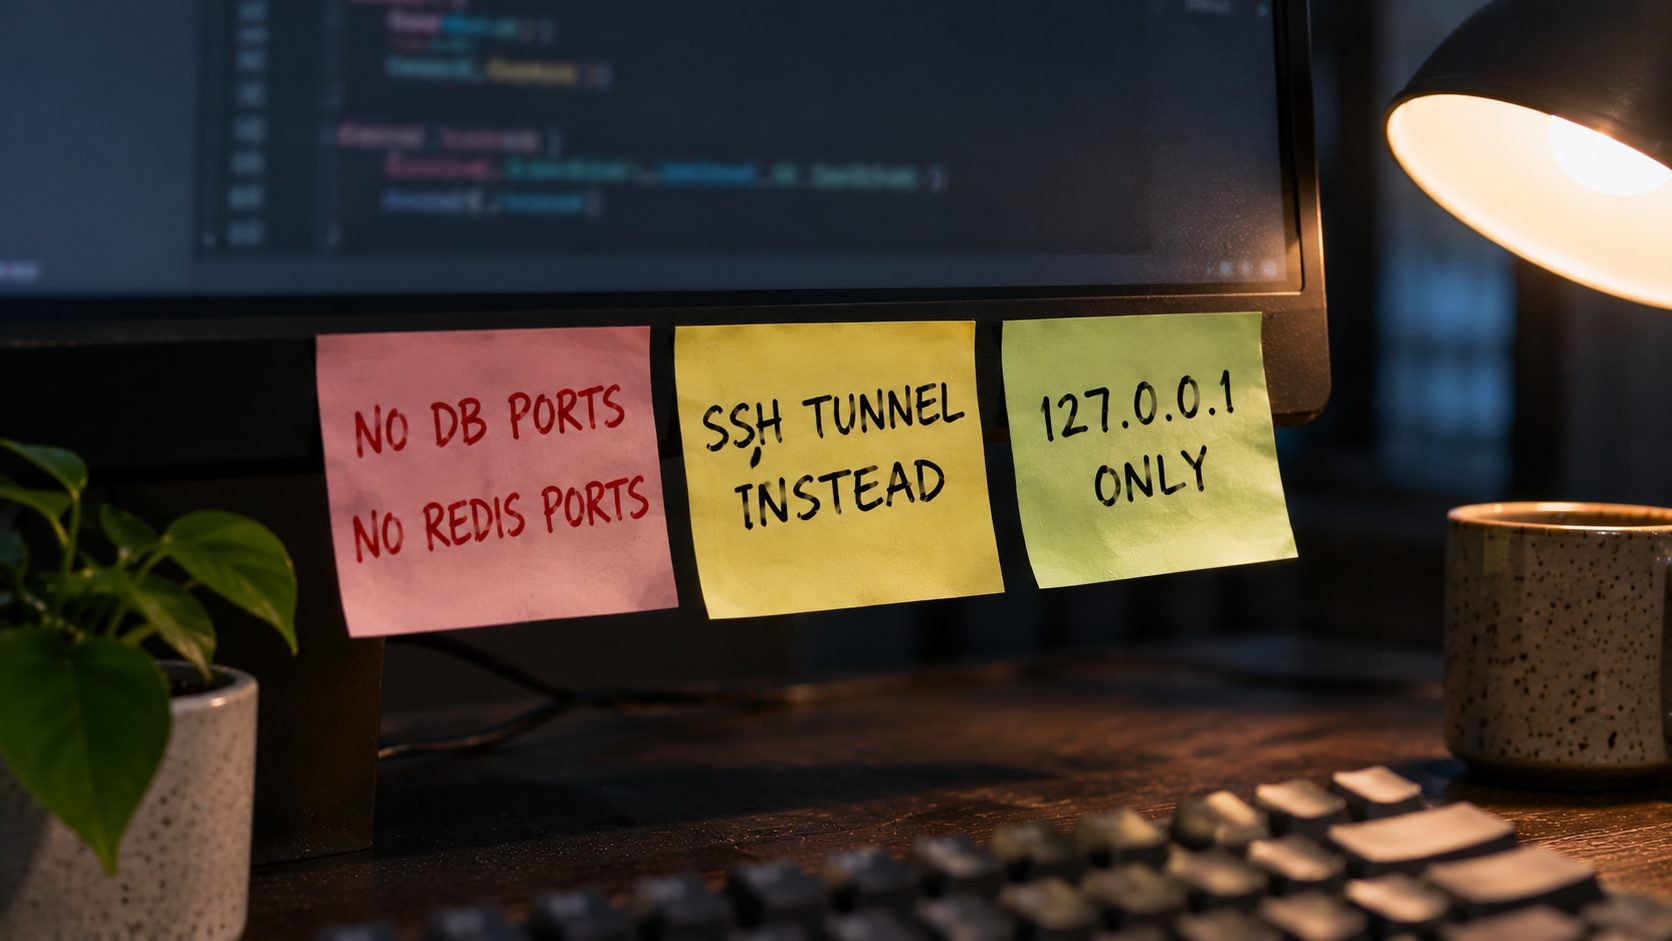
Notice that only Caddy has a ports section. The database and Redis are reachable only by other containers on the private Compose network. That is deliberate. Docker's port publishing documentation states that "publishing container ports is insecure by default", because a published port is available "not only to the Docker host, but to the outside world as well."
It is worse than it sounds on a server with ufw. Docker manages its own firewall rules, and its documentation notes that Docker and ufw use firewall rules in ways that make them incompatible, so a published container port can be reachable even when ufw appears to block it. Some tutorials, including well-known ones, publish the database port on the host. Do not copy that line into production.
If you need to reach the database from your own machine, use an SSH tunnel. If a container must publish a port for a proxy running on the host itself, bind it to localhost only, for example "127.0.0.1:8080:80", so only the server can reach it.
Step 5: Handle Secrets and Environment Variables
Your .env file lives on the server, never in the image and never in Git. Restrict it to the deploy user:
bash
chmod 600 /srv/myapp/.envCompose loads it into every app container through env_file, and the same values feed the database container. For very sensitive values, such as payment keys, Docker secrets mount values as files instead of environment variables, which keeps them out of docker inspect output.
Generate APP_KEY once and keep it safe. It encrypts sessions, cookies and any encrypted model fields, so changing it logs everyone out and can make encrypted data unreadable. Treat it like a database password.
Keep a copy of the production .env somewhere safe outside the server, such as a password manager or a secrets manager, so a lost server does not mean lost credentials. Use different database passwords and keys for staging and production, and never copy production secrets into a local .env for debugging. When someone leaves the team, rotate the secrets they had access to: database passwords, API keys and the deploy SSH key.
Protect the machines that hold these secrets too. A deploy key or .env file copied to a compromised laptop is a common way in, which is why this developer laptop security checklist is worth working through alongside your server hardening.
Step 6: Add a Reverse Proxy and SSL
You have three good options for HTTPS:
- Caddy: obtains and renews certificates automatically with almost no configuration. The simplest choice for most single-server setups.
- Traefik: discovers containers through labels and also handles certificates automatically. Useful when you run many apps on one server.
- Nginx with Certbot: familiar and flexible, but you manage certificate renewal yourself.
This guide uses Caddy. Point your domain's DNS A record at the server, then create the Caddyfile:
text
example.com, www.example.com {
    encode zstd gzip
    reverse_proxy web:80
    header Strict-Transport-Security "max-age=31536000"
}
On first start, Caddy requests certificates for both hostnames and redirects HTTP to HTTPS automatically. Certificates are stored in the caddy_data volume, so they survive restarts. Certificate issuance only works once DNS points at the server and ports 80 and 443 are open, so check both before the first start if certificates fail.
Running more than one app on the same VPS
The same pattern scales to several apps on one server. Move Caddy into its own small Compose project with a shared external Docker network, connect each app's web container to that network, and add one block per domain to the Caddyfile, each pointing at that app's web container name. Each app keeps its own private database and Redis network, so apps cannot reach each other's data, while a single Caddy handles certificates for every domain. Watch memory closely when you do this, because each app brings its own database and workers.
If you also put Cloudflare in front of the server, use the Full (strict) SSL mode so traffic is encrypted all the way to Caddy, and avoid Flexible mode, which causes redirect loops. Many of the settings in this Cloudflare settings guide apply to Laravel apps as well. Add HSTS only once HTTPS works everywhere, because browsers remember it.
Step 7: First Deploy and Every Release After
The first deploy
Copy compose.yaml, Caddyfile and .env to /srv/myapp on the server, log in to your container registry, then:
bash
cd /srv/myapp
docker compose pull
docker compose up -d db redis
docker compose run --rm app php artisan migrate --force
docker compose up -d
curl -fsS https://example.com/up
The storage volume is created from the image's own storage folder the first time, so permissions are already correct.
If your app needs starting data, such as an admin user, roles or default settings, run a seeder the same way: docker compose run --rm app php artisan db:seed --class=ProductionSeeder --force. Keep production seeders separate from the demo data you use locally. Then open the site, log in, trigger a queued job such as a test email, and confirm it arrives. Checking one real queued job on day one tells you the queue container, Redis and mail settings all work together, which saves a confusing search later when users report missing emails.
Building images in CI
Build and push images from CI, such as GitHub Actions, rather than on the production server. Tag each build with the Git commit SHA, so every release is traceable and every old version is still available for rollback:
bash
docker build --target app -t registry.example.com/myapp-app:$GIT_SHA .
docker build --target web -t registry.example.com/myapp-web:$GIT_SHA .
docker push registry.example.com/myapp-app:$GIT_SHA
docker push registry.example.com/myapp-web:$GIT_SHA
Building on the server works for small projects, but it uses the server's CPU and memory during every deploy and needs build tools installed in production.
A minimal GitHub Actions workflow that builds both images on every push to main and then runs the release script over SSH looks like this:
yaml
# .github/workflows/deploy.yml
name: Deploy
on:
  push:
    branches: [main]

jobs:
  build-and-deploy:
    runs-on: ubuntu-latest
    steps:
      - uses: actions/checkout@v4

      - name: Log in to registry
        run: echo "${{ secrets.REGISTRY_PASSWORD }}" | docker login registry.example.com -u "${{ secrets.REGISTRY_USER }}" --password-stdin

      - name: Build and push images
        run: |
          docker build --target app -t registry.example.com/myapp-app:${{ github.sha }} .
          docker build --target web -t registry.example.com/myapp-web:${{ github.sha }} .
          docker push registry.example.com/myapp-app:${{ github.sha }}
          docker push registry.example.com/myapp-web:${{ github.sha }}

      - name: Release on the server
        run: |
          echo "${{ secrets.DEPLOY_SSH_KEY }}" > key && chmod 600 key
          ssh -i key -o StrictHostKeyChecking=accept-new deploy@${{ secrets.SERVER_IP }} "/srv/myapp/deploy.sh ${{ github.sha }}"
Store the registry credentials, the server IP and a dedicated deploy SSH key as repository secrets. Give that deploy key access to the deploy user only, never root, so a leaked CI secret cannot take over the whole server. Run your test suite as a job before this one, so a failing build never reaches production.
The release script
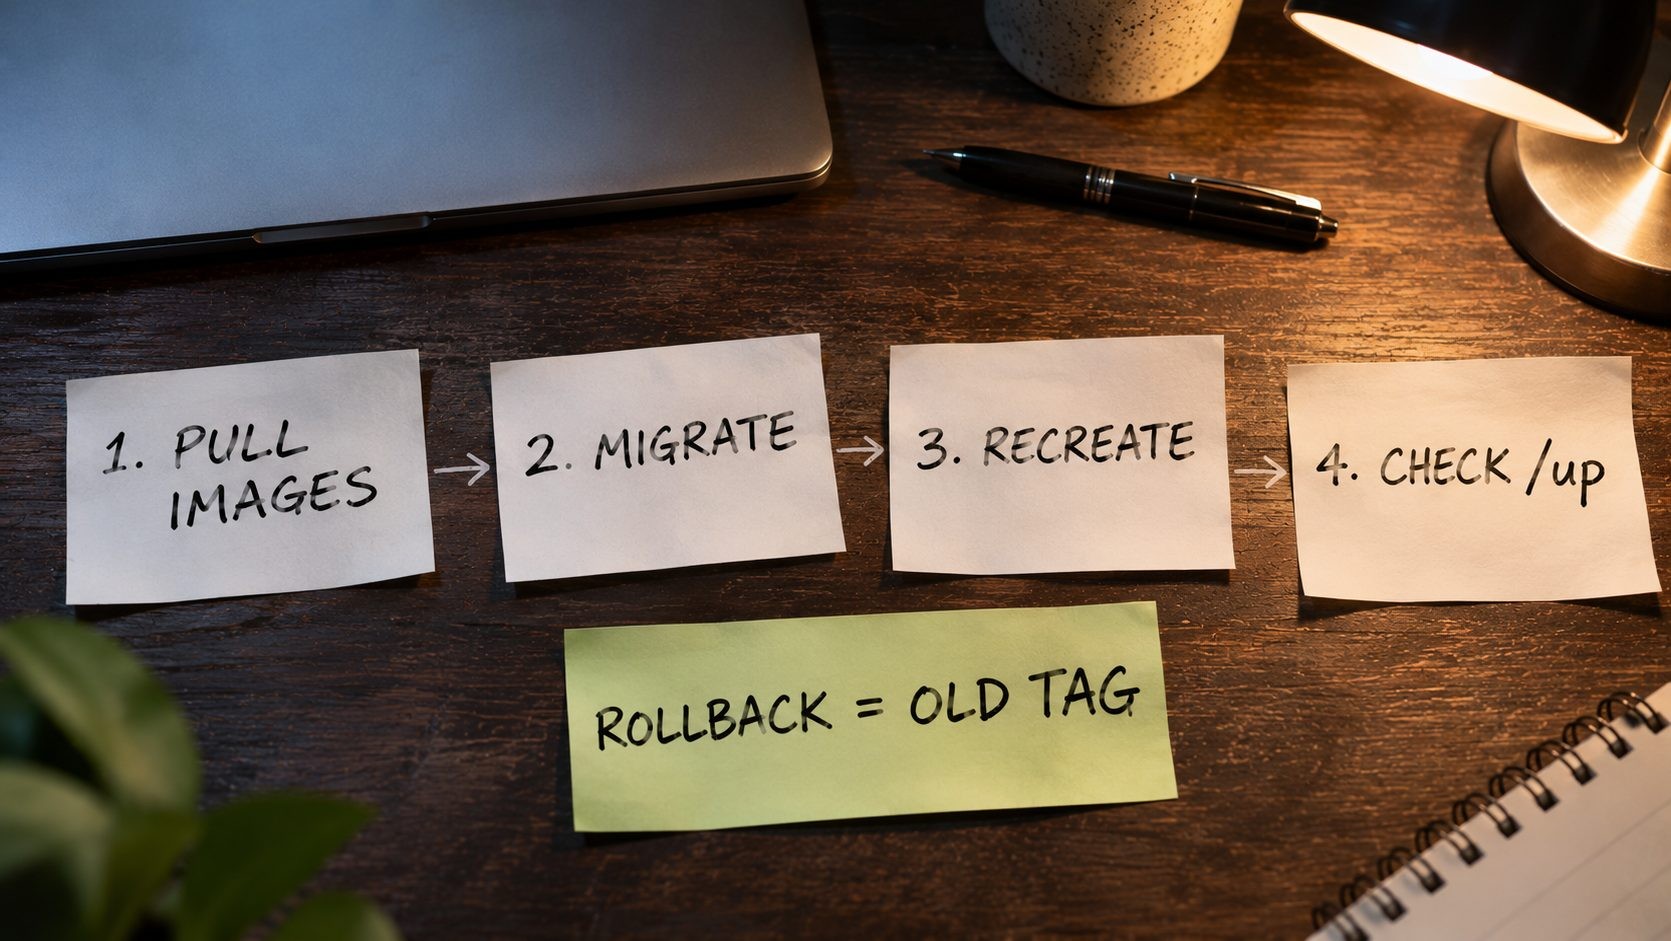
Every release after the first follows the same order:
bash
#!/usr/bin/env bash
# deploy.sh <tag>
set -euo pipefail
export TAG="$1"
cd /srv/myapp

docker compose pull app web queue scheduler
docker compose run --rm app php artisan migrate --force
docker compose up -d --remove-orphans
sleep 5
curl -fsS https://example.com/up > /dev/null && echo "Release $TAG is healthy"
Migrations run in a one-off container before the new code goes live. Then up -d recreates every container that uses a new image. Because the queue and scheduler containers are recreated, they start fresh on the new code. If you ever deploy without recreating containers, run php artisan reload, which Laravel's documentation recommends after each deploy so long-running services such as queue workers use the new code.
Write migrations so the old code still works against the new schema, because the old version keeps running while migrations finish. Add columns before the code uses them, and remove old columns in a later release.
Zero-downtime options
Recreating the app container causes a short interruption, usually a few seconds of errors while the new container starts. For many apps, that is acceptable if deploys happen at quiet times. If it is not, run two app containers and update them one at a time behind the proxy, or use a blue/green approach: start the new version as a separate set of containers, check its health route, then switch the proxy over. For planned maintenance that needs longer, use Laravel's maintenance mode and return the right status code, as explained in this guide to handling maintenance without losing rankings.
Rolling back
Because every image is tagged, rolling back is one command with the previous tag: ./deploy.sh <previous-sha>. Database rollbacks are harder, which is one more reason to keep migrations backward compatible. Framework upgrades deserve the same care, as covered in this Laravel upgrade guide.
Step 8: Backups, Logs and Monitoring
Database backups. Dump the database nightly and copy it off the server:
bash
# crontab -e (as the deploy user)
0 3 * * * cd /srv/myapp && docker compose exec -T db pg_dump -U laravel -Fc laravel > /srv/backups/db-$(date +\%F).dump
Then sync /srv/backups to offsite storage, such as an S3-compatible bucket, and delete local copies after a few days. Test a restore regularly. A backup you have never restored is a hope, not a backup.
Storage backups. If users upload files to local storage, back up the storage volume too, or better, store uploads in object storage from the start, which removes the problem and makes scaling easier.
Logs. The x-logging block caps each container's log files at 10 MB with three files kept, so logs cannot fill the disk. View them with docker compose logs -f app or docker compose logs --since 1h queue.
Monitoring. Point an uptime monitor at https://example.com/up. Laravel lets you extend this route by listening for the DiagnosingHealth event and checking the database or cache, so a broken database connection shows up as a failed health check. Add alerts for disk space and memory, the two resources that most often take a small VPS down.
For errors inside the app, connect an error tracking service so exceptions reach you with a stack trace, rather than sitting unread in container logs. For queues, watch the number of waiting and failed jobs. A queue that keeps growing usually means workers are stuck or too few, and php artisan queue:failed shows jobs that need attention. If you want a dashboard for queues on Redis, Laravel Horizon can replace the plain queue:work container and gives you per-queue metrics and retries.
Finally, update the base images regularly. Rebuilding your image every week or two picks up security fixes in PHP, Alpine and Nginx, and docker compose pull does the same for the database, Redis and Caddy images.
Common Problems and Fixes
- Permission denied on storage or logs. The app runs as
www-data, so thestorageandbootstrap/cachefolders must belong to it. If you created the volume before fixing ownership, remove and recreate it, or fix ownership inside the container. - 502 Bad Gateway. Nginx cannot reach PHP-FPM. Check that the app container is healthy (
docker compose ps) and thatfastcgi_passuses the service nameapp. - Settings return null after caching. Something calls
env()outside a config file. Move the value into a config file and read it withconfig(). - Queue jobs running old code. The queue container was not recreated or reloaded after a deploy. Recreate it or run
php artisan reload. - HTTP links or redirect loops behind HTTPS. Trusted proxies are not set, or Cloudflare is in Flexible SSL mode.
- Disk full. Old images pile up over time. Run
docker image prune -awith care, or prune images older than your rollback window. - Scheduled tasks running twice. More than one scheduler container is running. Keep exactly one.
- Containers keep restarting. Run
docker compose logs appand look at the last lines before each restart. The most common causes are a missing environment variable, a failedphp artisan optimizein the entrypoint, or the database not being ready yet. - Uploads fail above a certain size. The limits in Nginx (
client_max_body_size) and PHP (upload_max_filesize,post_max_size) must all allow the file size, and so must any CDN in front of the server.
Scaling Beyond One VPS
This setup takes most apps a long way. When it stops being enough, the next steps are usually:
- Move the database to a managed service or its own server, so the app server can be replaced without risk to data.
- Run several app servers behind a load balancer, with Redis for sessions and cache, and object storage for uploads, so any server can handle any request.
- Use Laravel Octane or FrankenPHP to keep the app in memory between requests, which can reduce response times for some workloads.
- Consider Kubernetes only when you genuinely need many services, autoscaling and a team to run it. For most Laravel apps, a few well-run servers are simpler and cheaper.
If you are building a SaaS, the architecture decisions in this guide to building a multi-tenant SaaS in Laravel shape how you scale, and front-end responsiveness matters as much as server capacity, as covered in this guide to improving INP on Laravel sites.
For the bigger picture, see our website security for small business guide: a layer-by-layer plan, a 30-day checklist and typical costs.
FAQs
Conclusion
A good production deployment is boring in the best sense. Every release follows the same steps: pull tagged images, run safe migrations, recreate containers and check the health route. The database is private, secrets stay on the server, certificates renew themselves, logs cannot fill the disk, and backups are tested. When something goes wrong, rolling back is one command.
Start with the setup in this guide on a single VPS, keep each process in its own container, and resist shortcuts like publishing database ports or deploying with development tools. From there, scaling out is a series of small steps rather than a rebuild.
Want your Laravel app built and deployed properly? SmartLink Services builds and deploys Laravel applications and SaaS platforms, from Docker setups and CI pipelines to monitoring and scaling. If you only need the server, Nexi Bloom VPS hosting gives you root access and NVMe storage to run it.
Get new posts by email
New guides and alerts, sent when they are published. No spam. Unsubscribe anytime.


Comments (0)