Multi-tenancy is one of those features that is easy to start and expensive to change. In the first week, adding a tenant_id column or installing a package feels like the whole job. Six months later, with real customers, you discover the decisions that actually mattered: how tenant data is separated, how the app knows which tenant a request belongs to, and what happens in queued jobs, caches and file uploads when nobody remembered to pass the tenant along.
Most Laravel multi-tenancy tutorials stop at installation. This guide focuses on the architecture instead. It walks through eight decisions every multi-tenant SaaS has to make, with the options, the trade-offs and a recommendation for each. You will also get a comparison of the two main packages, a launch checklist, and a worked example from a real multi-tenant website builder.
The examples assume a modern Laravel version (12 or 13), but the decisions themselves apply to any stack. Most of them are about where to draw boundaries, and those boundaries matter far more than which helper you use to enforce them.
Quick answer: how to build multi-tenancy in Laravel
- Choose your isolation model first: shared database, database per tenant, or schema per tenant.
- Identify the tenant early, usually by subdomain or custom domain, and fail closed.
- Scope every query by default, so forgetting a filter cannot leak data.
- Make queues, cache, sessions and file storage tenant-aware.
- Plan migrations, backups and tenant deletion before you have hundreds of tenants.
- Use a proven package unless your needs are genuinely simple.
What Multi-Tenancy Means in Laravel
A multi-tenant application serves many customers, called tenants, from one codebase and one deployment, while keeping each tenant's data separate. A tenant is usually a company or account, not a single user. One tenant might have one user or a thousand.
It is worth separating three ideas that often get mixed up:
- Users are people who log in.
- Teams group users inside one account, like workspaces in a project tool.
- Tenants are the boundary for data isolation. Data from one tenant must never appear in another.
Laravel does not ship a built-in tenancy layer. You build it yourself with middleware, global query scopes and some care across the framework, or you use a package that does most of that for you. Both approaches are covered below.
Not every app needs full multi-tenancy. If you build software for a single customer, or your "accounts" are simple teams that share all reference data, a team_id with policies may be enough. And if you are still deciding whether Laravel is the right foundation at all, this comparison of Laravel vs WordPress covers when a custom application makes sense.
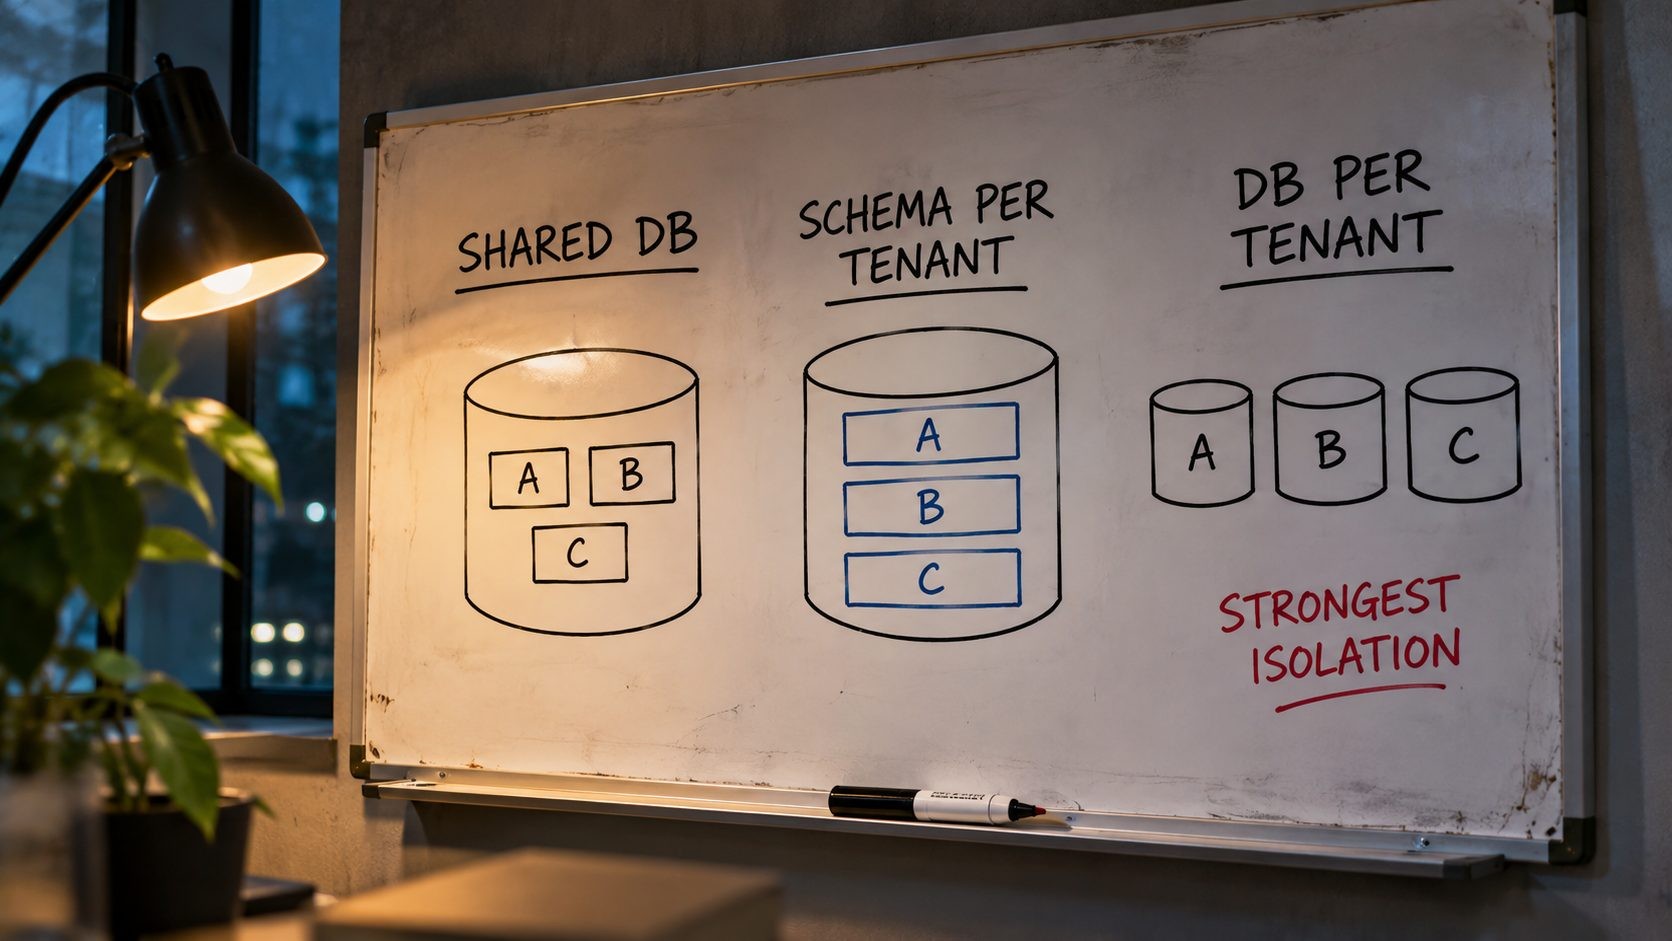
Decision 1: How You Isolate Tenant Data
This is the most important decision, and the hardest to reverse.
Single database with a tenant_id column
Every tenant-owned table has a tenant_id column, and every query filters by it. This is the simplest and cheapest model. There is one database to back up, one set of migrations to run, and reporting across all tenants is just a query.
The risk is equally simple: one missing where('tenant_id', ...) exposes another customer's data. With this model, scoping must be automatic (see Decision 4), not something developers remember to add.
Database per tenant
Each tenant gets its own database, and the app switches the connection after identifying the tenant. A central (sometimes called landlord) database stores the list of tenants, their domains, plans and connection details.
Isolation is much stronger, because a query physically cannot reach another tenant's tables. Restoring one tenant from backup, exporting their data or deleting them completely is straightforward. The costs are operational: migrations must run once per tenant, the number of databases and connections grows with your customer count, and cross-tenant reporting needs a separate process.
Schema per tenant (PostgreSQL)
PostgreSQL supports schemas, which are like folders of tables inside one database. Giving each tenant a schema sits between the other two models: stronger separation than a shared table, with fewer separate databases to manage. It does tie you to PostgreSQL, which is one of several reasons covered in this comparison of PostgreSQL vs MySQL for a Laravel SaaS.
Row-level security as a safety net
If you use a shared database on PostgreSQL, row-level security (RLS) can add a second line of defense below your application code. You enable it per table and create policies that filter rows, for example by a tenant ID set for the current connection. According to PostgreSQL's row security policies documentation, a table with RLS enabled and no policy uses "default-deny", so no rows are visible.
There are caveats. Table owners bypass RLS by default unless you use FORCE ROW LEVEL SECURITY, superusers and roles with the BYPASSRLS attribute always bypass it, and integrity checks such as unique and foreign keys are not filtered. So your app should connect with a role that does not own the tables, and RLS should back up your application scoping, not replace it.
Comparing the models
| Shared database | Schema per tenant | Database per tenant | |
|---|---|---|---|
| Isolation | Lowest, depends on code | Medium | Highest |
| Cost to run | Lowest | Medium | Highest |
| Migrations | Once | Once per schema | Once per database |
| Per-tenant backup and restore | Hard | Moderate | Easy |
| Cross-tenant reporting | Easy | Moderate | Hard |
| Best for | Many small tenants, simple data | PostgreSQL apps wanting stronger separation | Fewer, larger or regulated tenants |
Think about where you will be in two years, not just at launch. Moving from a shared database to database per tenant later means splitting every table by tenant ID and migrating live customers one at a time, which is slow and risky. Moving the other way is just as hard. That is why this decision deserves a proper discussion before the first migration is written.
A practical rule: if your tenants are many and small, start with a shared database and strict automatic scoping. If your customers expect strong isolation, store sensitive data or may need their own backups and exports, choose database per tenant from the start.
Decision 2: How You Identify the Tenant
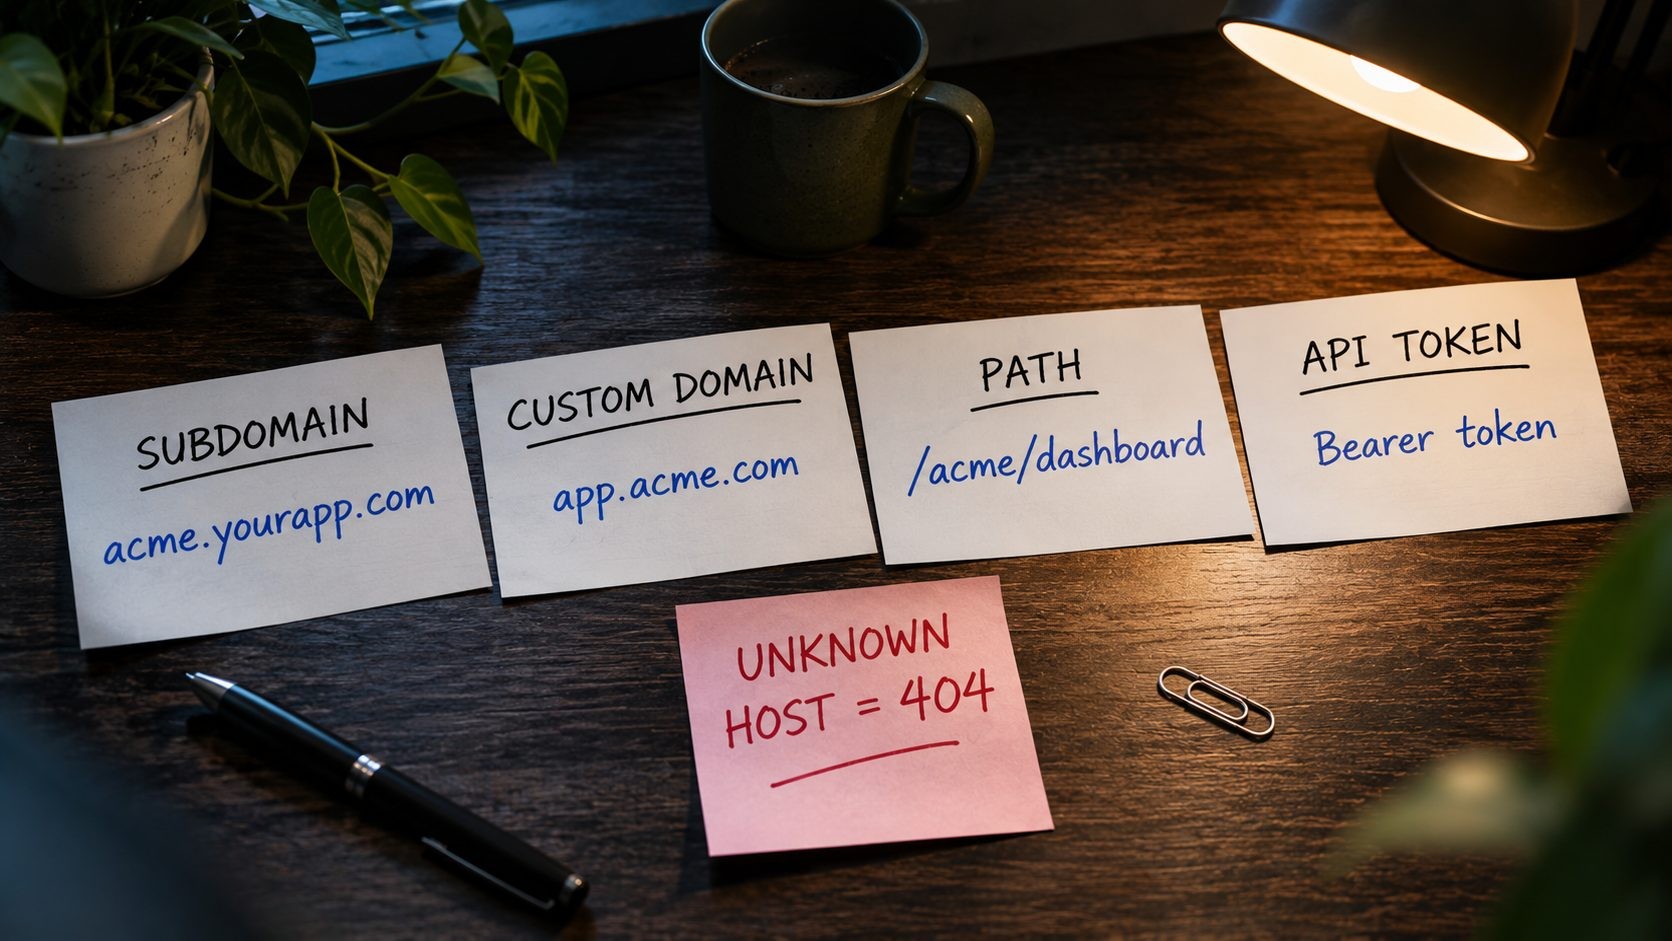
Before anything else happens in a request, the app must know which tenant it belongs to. Common methods:
- Subdomain:
acme.yourapp.com. Clean, familiar and easy to route with wildcard DNS. - Custom domain:
app.acme.comoracme.com, pointed at your servers by the customer. - Path:
yourapp.com/acme/.... Simple, but every route and link must carry the tenant segment. - Header or token: For APIs and mobile apps, the tenant comes from the authenticated token or a header.
Most SaaS products use subdomains for everyone and custom domains as a paid feature, so the app needs to resolve both.
Identify the tenant in middleware, as early as possible, and fail closed. If a request arrives for a host that does not match any tenant, return a 404. Never fall back to a default tenant, because that is how one customer ends up seeing another's homepage.
php
// app/Http/Middleware/IdentifyTenant.php
public function handle(Request $request, Closure $next): Response
{
    $tenant = Tenant::query()
        ->whereHas('domains', fn ($q) => $q->where('domain', $request->getHost()))
        ->first();

    abort_if(! $tenant, 404);

    app(CurrentTenant::class)->set($tenant);

    return $next($request);
}
Cache the domain lookup. Resolving the tenant happens on every request, so a cached map of hostnames to tenant IDs avoids a database query each time. Clear that cache entry whenever a domain is added, changed or removed.
For APIs, do not rely on the host alone. A mobile app or integration usually calls one API hostname for every tenant, so the tenant should come from the authenticated token. Check that the token's user actually belongs to that tenant, rather than trusting a tenant ID sent in a header or request body.
Keep a clear split between central routes (marketing site, sign-up, billing, your admin panel) and tenant routes. Central routes run without a tenant, tenant routes always run with one, and no route should accidentally work in both contexts.
Decision 3: Custom Domains and SSL
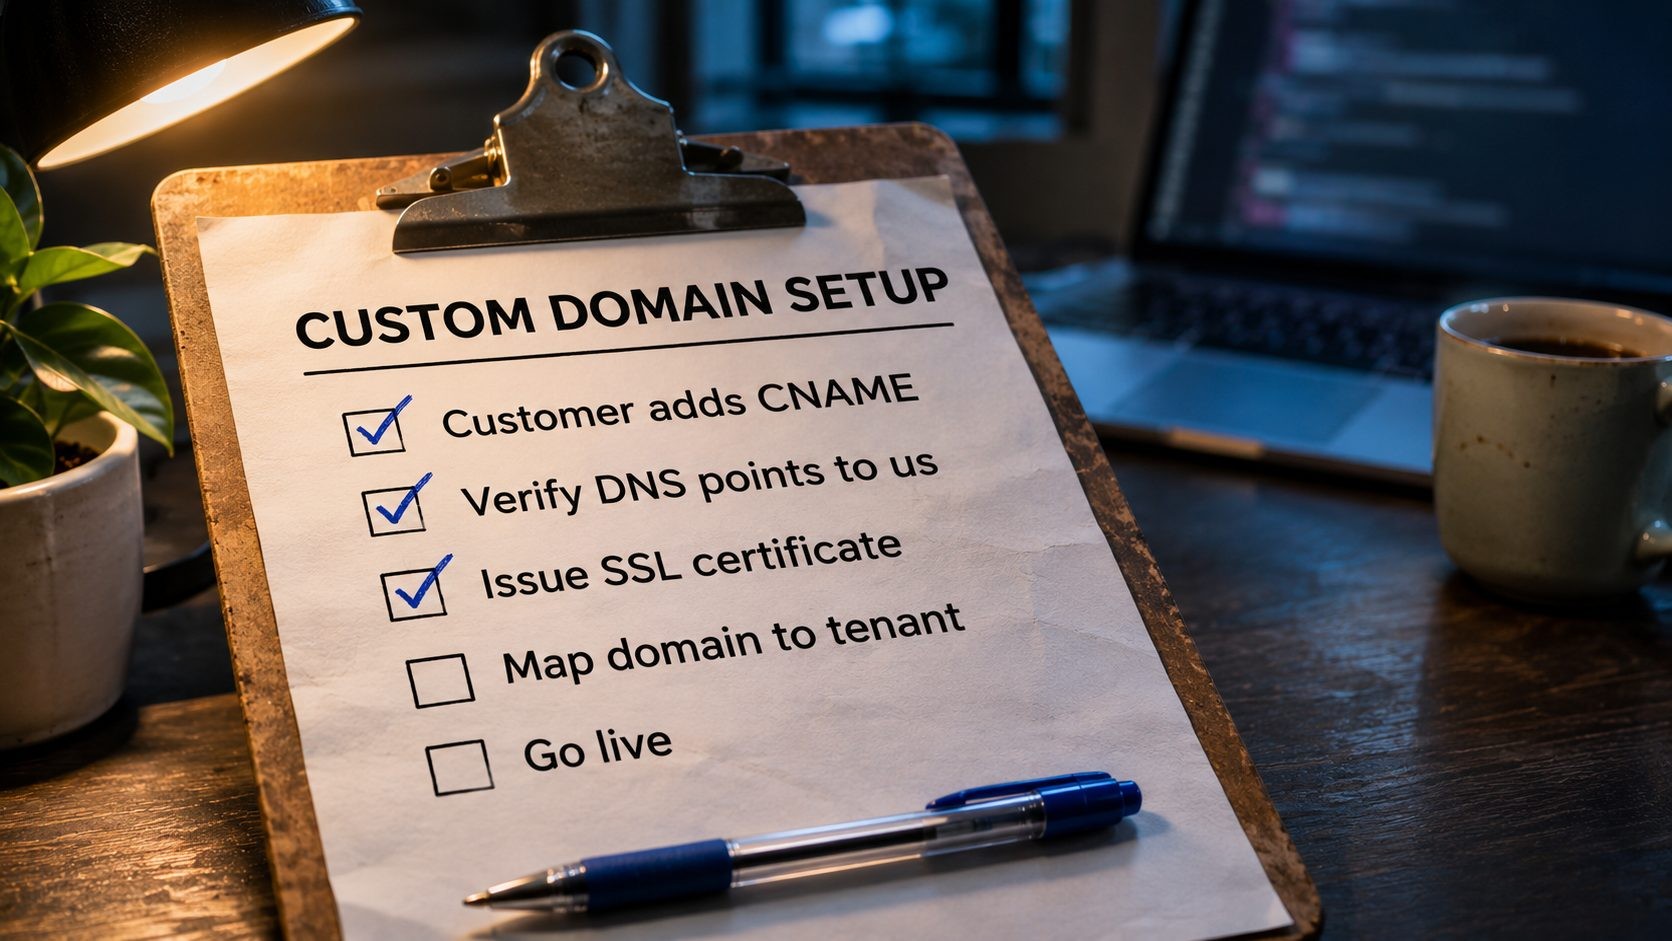
Custom domains are often the first "enterprise" feature customers ask for, and they involve more than routing.
DNS. For a subdomain such as app.acme.com, the customer adds a CNAME record pointing to a hostname you control, such as sites.yourapp.com. Root domains (acme.com) are harder, because a CNAME is not allowed at the apex in standard DNS. You will need to support A records pointing at your IP addresses, or rely on DNS providers that offer CNAME flattening.
Verification. Do not activate a domain just because a customer typed it in. Check that DNS actually points to you, or ask for a TXT verification record, before the domain goes live. Otherwise one tenant could claim a domain that belongs to someone else.
Reserved names. Block subdomains like www, admin, api, mail and app, so tenants cannot register them.
SSL. Every custom domain needs a valid certificate, issued automatically. You have two broad options. You can run automatic certificate issuance (ACME, for example Let's Encrypt) on your own servers or load balancer, triggered when a domain is verified. Or you can put a service in front that handles it for you. Cloudflare for SaaS, for example, routes customers' custom hostnames to your origin and keeps their traffic encrypted, and it is bundled with Cloudflare's non-Enterprise plans. For your own subdomains, a single wildcard certificate for *.yourapp.com covers every tenant subdomain at once, which is far simpler than issuing one certificate per tenant. Custom domains are what need individual certificates.
If you already use Cloudflare, the security and caching basics in this Cloudflare settings guide apply to tenant sites too.
Finally, decide what happens when a customer's DNS breaks or they cancel. Expired domains should stop resolving to tenant content cleanly, rather than serving errors or another tenant's site.
Decision 4: Making Every Layer Tenant-Aware
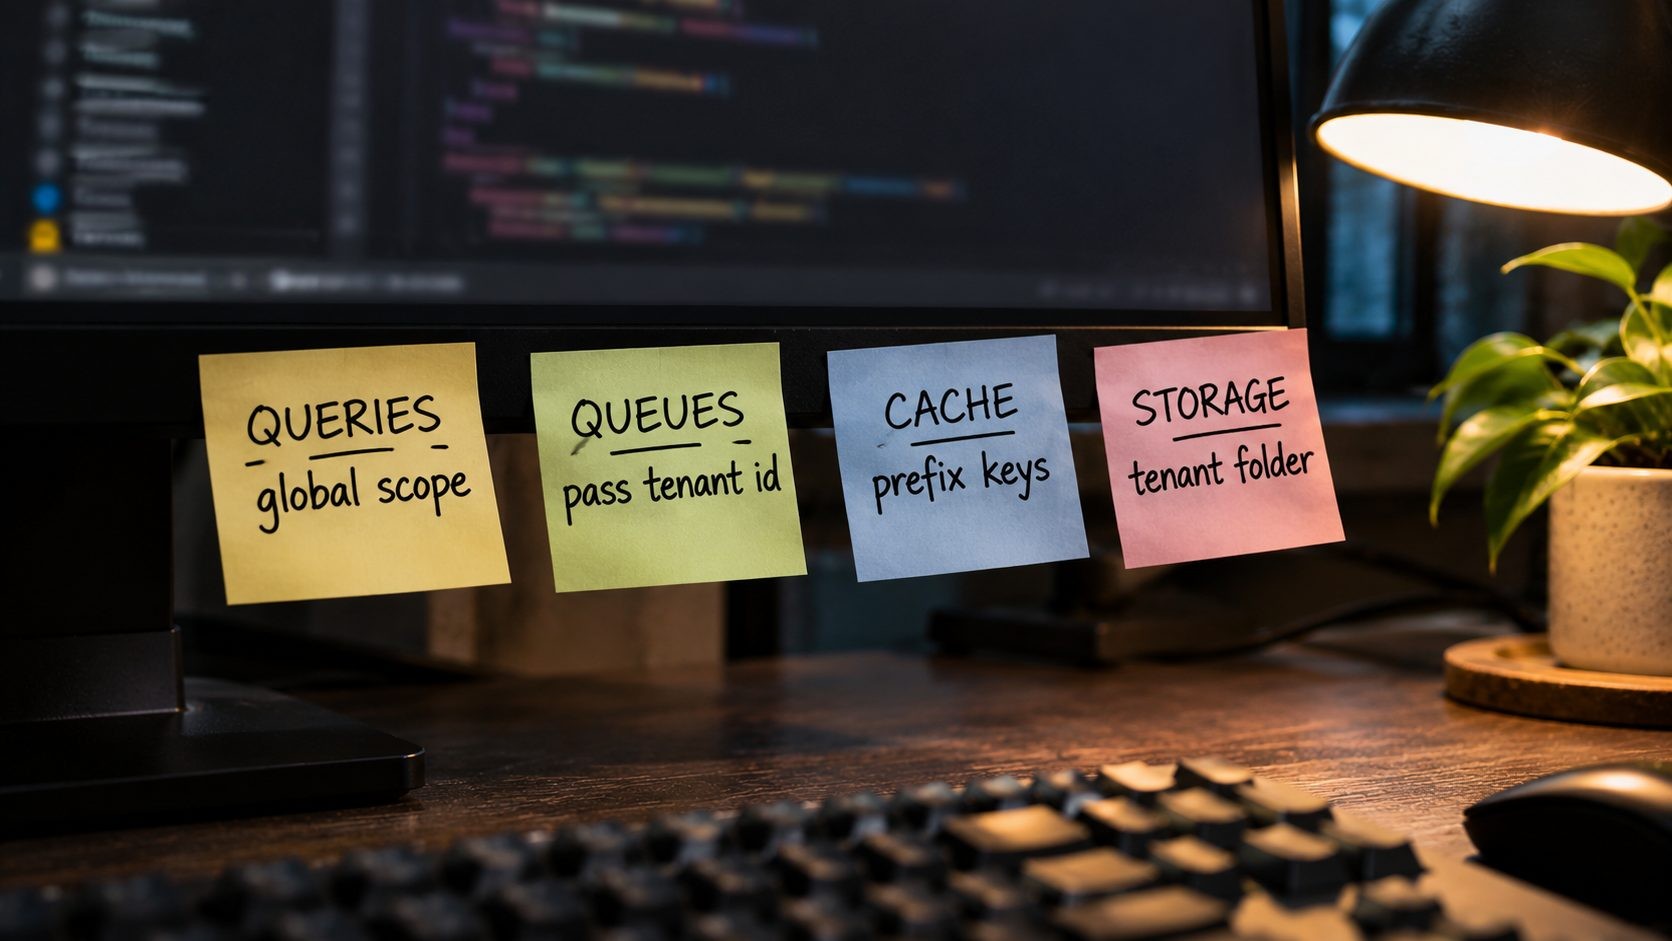
Identifying the tenant is only half the job. Every part of the framework that stores or retrieves data has to respect that tenant for the rest of the request, and for any work that continues after it. Most multi-tenancy data leaks do not happen in controllers. They happen in the places nobody thinks about: background jobs, caches, scheduled commands and file storage.
Queries
In a shared database, scope tenant models automatically with a global scope, so forgetting a filter is not possible in normal code:
php
// app/Models/Concerns/BelongsToTenant.php
trait BelongsToTenant
{
    protected static function bootBelongsToTenant(): void
    {
        static::addGlobalScope('tenant', function (Builder $query) {
            $tenantId = app(CurrentTenant::class)->id();

            // Fail closed: no tenant means no rows.
            $tenantId
                ? $query->where($query->getModel()->qualifyColumn('tenant_id'), $tenantId)
                : $query->whereRaw('1 = 0');
        });

        static::creating(function (Model $model) {
            $model->tenant_id ??= app(CurrentTenant::class)->id();
        });
    }
}
Your central admin area will sometimes need to see across tenants. Make that an explicit, deliberate choice, such as calling withoutGlobalScope('tenant') in a few reviewed places, rather than something any query can do by accident.
Then write tests that try to break it: create two tenants, act as one, and assert that the other tenant's records cannot be read, updated or deleted, including through route model binding. Watch for raw queries, DB::table() calls and reporting code, which bypass Eloquent scopes. Validation rules such as unique and exists also need a tenant condition, or two tenants will block each other's usernames and slugs.
Queues and scheduled jobs
A queued job runs later, in a different process, with no request and therefore no tenant. Pass the tenant ID into the job and restore the tenant context before doing any work:
php
class GenerateInvoicePdf implements ShouldQueue
{
    use Queueable;

    public function __construct(public int $tenantId, public int $invoiceId) {}

    public function handle(CurrentTenant $current): void
    {
        $current->set(Tenant::findOrFail($this->tenantId));

        $invoice = Invoice::findOrFail($this->invoiceId);
        // Generate and store the PDF in this tenant's storage...
    }
}
Queue workers are long-running, so the current tenant must be reset between jobs, or job B may run with job A's tenant. Scheduled commands need the same care: a nightly task usually loops over tenants and sets the context for each one in turn. Both main packages handle tenant-aware queues for you, which is one of the strongest reasons to use one.
Events and notifications need the same treatment. A broadcast channel, an email or a webhook triggered for one tenant must carry that tenant's context and settings, such as their branding, sender address and webhook URL. Otherwise customers receive messages styled for, or sent from, the wrong account.
Cache, sessions and Redis
Cache keys like settings or menu will collide across tenants. Prefix every tenant cache key with the tenant ID, or configure a per-tenant cache prefix when the tenant is identified. Sessions on custom domains are naturally separate because cookies are scoped to the domain, but sessions on subdomains need a cookie domain that does not leak across tenant subdomains.
File storage
Store each tenant's uploads under their own disk or path prefix, such as tenants/{id}/..., and never build file paths from user input alone. Use signed or temporary URLs for private files, and make sure the web server user can write to every tenant's folder. Permission mismatches between folders created by different processes are a common source of upload failures after a migration.
Decision 5: Use a Package or Build It Yourself
Two packages dominate Laravel multi-tenancy, and both are actively maintained.
| stancl/tenancy | spatie/laravel-multitenancy | Build it yourself | |
|---|---|---|---|
| Latest version | v3.10.1 (Aug 2026) | 4.3.0 (Oct 2026) | Not applicable |
| Laravel support | 10 to 13 | 12 and 13 (PHP 8.3+) | Any |
| Approach | Feature-rich, can switch database, cache, filesystem and queues automatically | Minimal, "bare essentials", you choose what switches | Global scopes and middleware |
| Best fit | Database per tenant with automatic context switching | Teams that want explicit control with less magic | Simple shared-database apps |
stancl/tenancy (Tenancy for Laravel) supports both single and multiple databases, but in its own words it "focuses more on multi-database tenancy." In automatic mode, once a tenant is identified, it switches the database connection, cache, filesystem and queues to that tenant's context. It ships middleware for identifying tenants by domain, subdomain, path or request data. The Tenancy for Laravel documentation covers both automatic and manual modes.
spatie/laravel-multitenancy takes the opposite philosophy: it "should only provide the bare essentials to enable multitenancy." It works with one or many databases, makes queued jobs tenant-aware and can run Artisan commands per tenant, while leaving most choices to you. Spatie's laravel-multitenancy docs are short and clear, which reflects that approach.
Before choosing, check how each package fits the rest of your stack: the admin panel you use, your queue setup, how you deploy, and whether you need tenants identified by custom domain. Read the parts of each package's documentation that cover queues, storage and testing, because those are where differences show up in daily work.
Building it yourself is reasonable for a shared-database app with a handful of tenant models. Once you need per-tenant databases, tenant-aware queues and custom domains, a package saves a lot of subtle work. Whichever you choose, keep tenancy logic in one place, so a future switch only touches that layer. For the rest of the stack around it, this overview of my Laravel tech stack covers the tools I pair it with.
Decision 6: Migrations, Seeding and Deployments
With a shared database, migrations work as usual. With schemas or databases per tenant, every deploy has to migrate every tenant, and that changes how you write migrations.
- Separate central and tenant migrations. Central migrations change the landlord database (tenants, plans, domains). Tenant migrations change each tenant's tables. Keep them in different folders.
- Run tenant migrations in batches. With hundreds of tenants, migrating them one after another inside the deploy step can take a long time and fail halfway. Queue a migration job per tenant, track which tenants succeeded, and retry failures.
- Write backward-compatible migrations. During a rolling migration, some tenants are on the new schema and some are not. Add columns before code uses them, and remove old columns in a later release.
- Seed per tenant. New tenants need default settings, roles and sample content. Run that as part of tenant creation, not as a manual step.
- Store each tenant's connection details safely. If the central record for a tenant is missing its database name or credentials, migrations and requests for that tenant fail. Validate these fields when tenants are created and after any data migration.
Long-running data changes deserve special care. Backfilling a new column across millions of rows, or across hundreds of tenant databases, should run as queued jobs in small chunks, separate from the schema migration itself. That keeps deploys fast and lets you pause or retry without leaving tenants in a broken state.
Test deploys against realistic data. A staging environment with a copy of a few real-sized tenants (with personal data removed) catches slow migrations and edge cases that two empty test tenants never will.
Framework upgrades need the same planning across every tenant, which is worth keeping in mind with guides such as this Laravel upgrade guide.
Decision 7: Billing, Plans and Limits
Billing belongs to the tenant, not to individual users. Store the plan, trial dates and subscription status on the tenant record in the central database, and check them in one place.
- Laravel Cashier handles Stripe subscriptions well, and the billable model can be your tenant.
- Feature flags and limits should read from the tenant's plan: number of users, projects, storage, custom domains, API calls. Enforce limits in the backend, not just by hiding buttons.
- Plan changes should take effect immediately and predictably. When a tenant downgrades, decide what happens to data over the new limit: keep it read-only, ask them to remove it, or block new additions only.
- Suspended and cancelled tenants need defined behavior. Decide whether a suspended tenant's site shows a notice, becomes read-only or goes offline, and how long data is kept after cancellation.
If you plan to sell AI features per plan, the same pattern applies to usage limits on AI calls, covered in more depth in this Laravel AI SDK guide.
Decision 8: Scaling, Noisy Neighbors and Operations
As tenants grow, a few will use far more resources than the rest. Plan for that early.
- Rate limit per tenant, not just per user, so one tenant's traffic spike or runaway integration cannot slow everyone else down.
- Monitor by tenant. Tag logs, slow queries and errors with the tenant ID, so you can see which tenant is causing load.
- Watch database connections. With database per tenant, connection counts can climb quickly under load. Connection pooling and sensible worker counts matter.
- Plan an escape hatch for big tenants. Being able to move one large tenant to its own database or server, without code changes, is a major advantage of designing tenancy as a clean layer.
- Backups and restores per tenant. Test restoring a single tenant, not just the whole system. Customers will ask.
- Tenant export and deletion. Have a documented process to export a tenant's data and delete it completely, including files, caches and queued jobs.
- Audit access. Your own support and admin tools can see every tenant, which makes them the riskiest part of the app. Log when staff access a tenant's data, and limit who can do it.
Security reviews should include tenancy specifically. Ask someone who did not build the tenancy layer to try to reach another tenant's data through IDs in URLs, file paths, exports, API filters and search. Those are the paths most often missed.
Front-end responsiveness still matters too. Tenant dashboards built with Livewire or Inertia can feel slow long before the database struggles, which this guide to improving INP on Laravel sites covers.
Worked Example: How Sitelyx Handles Tenants
Sitelyx is a multi-tenant website builder built on Laravel, and it shows how these decisions play out in a real product. Each customer site is a tenant. New sites start on a subdomain of the platform, and customers can connect their own custom domain when they are ready. This blog itself runs as one of those tenant sites.
The architecture follows the decisions above:
- Isolation: Each tenant's pages, content and settings are kept separate from every other tenant, while the template library, builder code and platform features are shared centrally.
- Identification: Requests are resolved to a tenant by host, so the same code serves a subdomain site and a custom-domain site.
- Custom domains: Customers point their domain at the platform, and the domain is mapped to their tenant after setup.
- Tenant-aware features: Features such as the drag-and-drop builder, AI blog generation, payments and analytics all run in the context of the tenant they belong to.
The most useful lessons came from operations rather than code. When the platform moved to new infrastructure, three problems appeared that every multi-tenant team should plan for. Some tenant records were missing the details needed to reach their data, so those sites failed until the records were repaired. File permissions differed between tenant storage folders created at different times, which broke uploads for some tenants. And database user permissions had to be set up correctly for every tenant database, not just the central one. None of these show up in local development with two test tenants, which is why a migration checklist and a test restore are worth the time.
The broader lesson is that tenancy is as much an infrastructure concern as an application one. Domains, certificates, database users, file permissions and queue workers all have to agree about which tenant is which. Treating them as part of the tenancy design, rather than as server details to sort out later, is what keeps a growing platform stable.
A Multi-Tenancy Launch Checklist
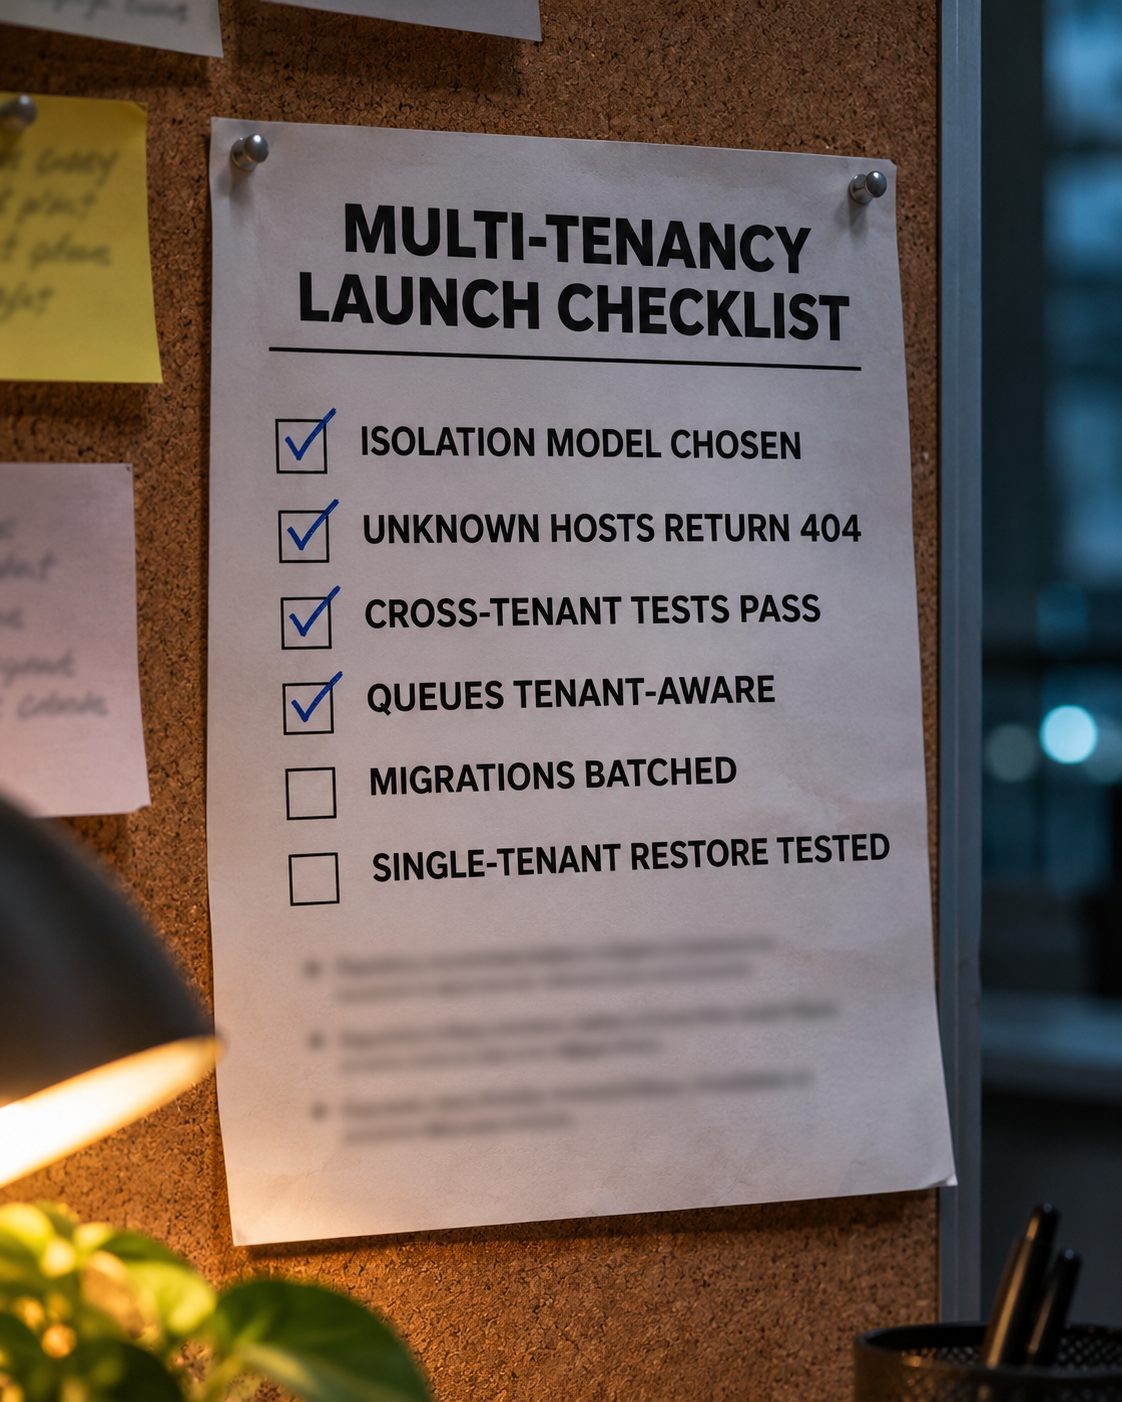
- Isolation model chosen and documented
- Tenant identification in middleware, with unknown hosts returning 404
- Reserved subdomains blocked
- Custom domain verification and automatic SSL working
- Global scopes or a package protecting every tenant model
- Tests proving one tenant cannot read or change another's data
- Tenant-aware queues, with context reset between jobs
- Tenant-prefixed cache keys and separated file storage
- Tenant-scoped validation rules (unique, exists)
- Central and tenant migrations separated, with batched tenant migrations
- Plans, limits and suspended-tenant behavior defined
- Per-tenant monitoring, rate limits, backups and a tested single-tenant restore
- A documented process for tenant export and deletion
FAQs
Conclusion
The difference between a multi-tenant Laravel app that scales and one that keeps causing incidents is rarely the package. It is the decisions behind it. Choose your isolation model deliberately, identify tenants early and fail closed, and make every layer tenant-aware: queries, queues, caches, sessions and storage. Then plan the operational side before you need it: batched migrations, per-tenant backups, monitoring, limits, and clean export and deletion.
Get those right, and adding the next hundred tenants is routine rather than risky. Get them wrong, and the cost shows up as data leaks, broken migrations and late-night restores, usually at the worst possible time.
Planning a multi-tenant SaaS? SmartLink Services designs and builds Laravel SaaS platforms, from tenant isolation and custom domains to billing, queues and deployment.
Get new posts by email
New guides and alerts, sent when they are published. No spam. Unsubscribe anytime.

Comments (0)